Security - Leaving Your Camper

The question of security and your camper is an important topic, particularly top of mind for women who are planning to solo camp. I’ve been asked everything from, how do I make sure no one steals my camper when I’m not on the campsite to, how likely is it that someone will unscrew the door hinges and remove it (the answer is never).  I’m getting ready for a very big solo trip myself so I thought it was a good time to share how I’m traveling and staying secure. If you haven’t already read it, here is the original article I wrote on security back in the day. Read on for our latest updates.

How concerned should you be?

I thought I’d start by providing some statistics. I can’t confirm the data source from the website that I used and it is slightly dated, but let’s assume this is directionally accurate in 2024 when I’m writing this.

  • In 2018, RV thefts accounted for approximately .2% of all motor vehicle thefts. 40% were from a residential location and 34% overall were not recovered.

  • In 2020, 12% of RV thefts were motorhomes. 88% of stolen RVs were towable.

  • RV theft is most common between June and August.

  • On average, 208 towable RVs are stolen per month.

At this point in our camping journey, I can happily report we have never experienced a security issue. We’ve covered a lot of miles, been in campgrounds and boondocked, stored the camper on our drive and in a facility and so far, so good. I think that’s due to a combination of good planning, buying the right products (for us), being smart about our choices and probably luck. As with all things camping, there is no single answer that is right for everyone but there are some basic things you want to do whatever your risk profile is. I break down the topic into two categories: safety away from the campsite (your rig vs. your gear) and at the campsite. This article will focus on being away from the campsite.


Securing Your Camper

When we first bought our camper, this was one of our biggest concerns and people ask me about it often. We worried that someone would literally just tow our camper away and we’d come back to an empty spot.

How we think about it

If you are at a campground, we think your camper being outright stolen is unlikely. Even if you have a very private spot, people will have seen you and some sketchy dude showing up with a tractor trailer hauling a rig away just isn’t likely. In most cases, you have to have a tag to get into the camping area at a state or national park which limits access even more. I do think the risk goes up if you are boondocking, but again, unless someone has seen you in the area AND knows that you’ve left your rig for a while, it’s probably not likely. But that doesn’t mean you can’t take precautions because the unlikely can happen. And remember the data above - your biggest risk may be when your rig is on your drive or at a storage facility, so be consistent wherever it is parked.

Behaviors we engage in

While no set of security options is foolproof, there are some basics that you want to consider and it helps to think about what someone needs to do to steal your rig. They either need to tow it by hitching it to their vehicle or they need to load it on to a flat bed - the precautions you take are the same. Make it hard for them to do that. Make your security very visible so that they decide that it is too risky to get through your precautions because it will take time and they may get caught.

And if you won’t creep anyone out, talk to the people in the site next to you. Say hi, let them know you will be around but planning a day away for hiking. Without directly asking them, you’ve made them aware of your schedule and an unknown person showing up at your site could trigger them to ask questions.

Products we use

There are two products you really need to invest in: a wheel lock and a hitch lock. These are designed to make it hard to physically move your rig and thus harder to steal. We consider these to be absolute required investments. Below I’ve described what they are, why you want them and have provided links to my Amazon Affiliate account. If you want to buy, please consider using these links to help me defer the cost of maintaining this site.


The Wheel Lock

If it can’t roll

it’s harder to steal

The lock we use - the Brahma lock - looks like it is no longer available. Here’s a link to our video showing how it works. I think that’s still useful to check out because it will give you a feeling for what the difference is in having a really robust wheel lock vs. something simpler and less expensive. The pro for us in using the Brahma lock is that I think it’s virtually impossible to quickly break it off. The con is that it can be fiddly to get on the wheel.

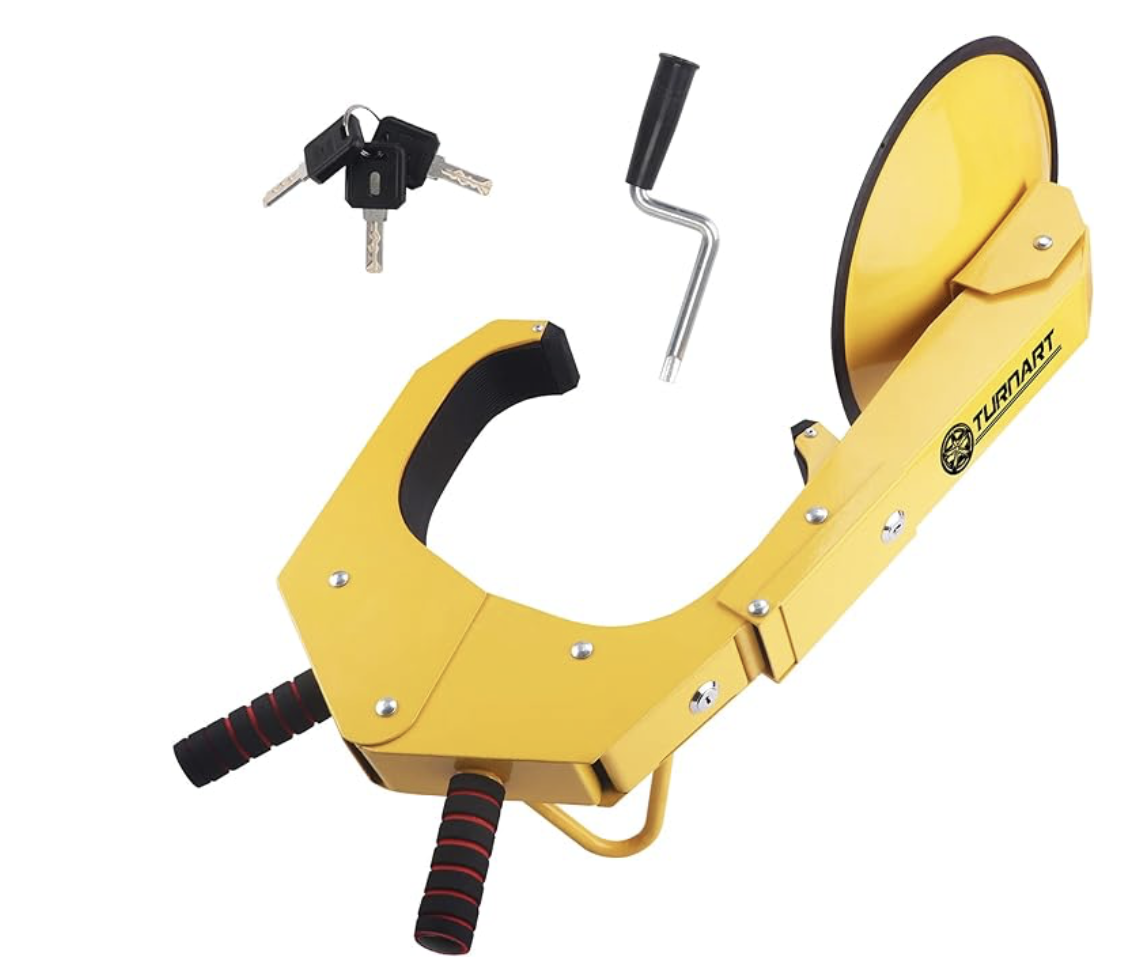
There is another brand on the market which I would buy if I didn’t have the Brahma and that is the Turnart Wheel Lock Clamp. This looks like an improvement over the standard pincer lock and closer to what we have. Regardless of what type of wheel lock you get, just get one. Seeing that there is one on your rig means one more security measure to remove before it can be stolen and that’s just a smart deterrent.


The Hitch Lock

Our choice in hitch locks for our camper

If you can’t hitch

it’s harder to steal

The hitch lock is an absolute must-own. It goes over the coupler, making it impossible for someone to attach your rig to their vehicle using their hitch. And while there are a couple of different styles out there, we use the Proven Industries hitch lock. This is designed for the 2 inch coupler we have on the Happier Camper rigs.

I get it - this is a very expensive lock but we think it’s worth it. It completely covers the coupler and your chains fit inside, making it impossible for someone to use them to tow your camper even without putting it on their hitch. That, plus the lock being on the underside (yes, it can be a pain to get to for us too) makes it hard to pick. If this is out of your price range, consider buying a lock for your coupler pin and a standard hitch lock.
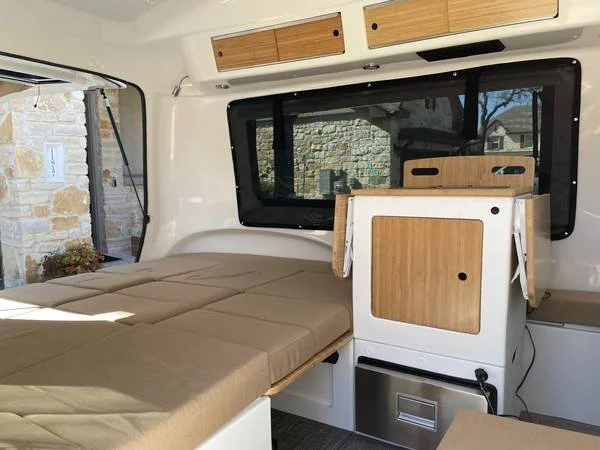

Securing your gear

I would say - if it’s expensive, don’t leave it in your camper - but given how much money we all spend on fitting out our rigs just the way we like, that isn’t very realistic. A thief would be better off stealing our mattress toppers than my iPad if they could sell them! That being said, there are some things you can do to limit your risk and hold on to your stuff.

How we think about it

Beach camping in Texas in our Happier Camper HCT

We try not to get too stressed about stuff being stolen out of our camper. The reality is, it’s pretty easy to break into a camper. Someone could smash a window and camper locks aren’t unique (check out this article and try not to panic). A lot of our camping is at state and national campgrounds - like this amazing site we had at a state park on the beach in Texas - where people just want to enjoy the great outdoors and aren’t there to commit a crime.

Behaviors we engage in

It’s not a long list but here goes…

  • If it’s electronics - laptops, cameras, drones, Starlink, portable AC units - put it in your vehicle and take it with you

  • Put movable things in the camper before you go and lock up. If it’s super heavy like a generator, chain it to the rig or a tree

  • If you can’t live without it, don’t bring it. I have some beaded Native American jewelry that I treasure and while I’d like to have it with me on long haul trips, I leave it at home. Losing it or having it stolen would break my heart because they can’t be replaced.

I know, there isn’t a lot here. And I don’t have any product recommendations either. I do want to revisit with Happier Camper if they have recommendations for replacement locks and whether that would void the warranty on the rig, but that’s an article for another time. If you have any security hacks that I haven’t covered, please drop in the comments below. Happy camping!

True Story from an hc1 owner

An owner recently posted this on our Facebook group and I thought it was so great, such a perfect description of what we all love about our Happier Campers, that I asked her for permission to share it here.

Now that we've "broken in" our camper (picked up in March this year from LA, drove it home, and have taken it in 3 weekend trips then a 12-day road trip around our home state), l'll share my favorite things about it.

As a background, we are a family of 5, kids are 12, 9, and 8, and we have a rooftop tent to supplement our sleeping spaces. We've never owned a camper before.

Favorite things:

  1. It's so cute. It's never not cute.

  2. We have the solar package. That alone is almost worth towing it around since it charges all our electronics. We almost never stay at campsites with full hookups so this is a pretty awesome upgrade for us. No more going to the campground bathroom to charge my phone!

  3. Adaptiv cubes are so sweet. Each kid got a cube for their things and it's more than enough for almost 2 weeks of clothes with a lot of room to spare. We didn't even use all the cubes we have, think of the possibilities!

  4. The camper itself is very comfty cozy. My husband is 6'1" and he does fit standing up in the middle and fits in the beds (we have a queen and single). Cushions are comfortable by themselves to sleep on. I quarantined in it for a week a few months ago and it worked out great (I worked, slept and ate in it). Hanging out or eating in it all together is surprisingly comfy as well.

  5. Being able to store or throw anything else in the camper while traveling. We were able to fit in 2 kid bikes while in bed mode, and a lot of our other crap we don't want to bother "tetris-ing" into our truck bed.

  6. It's pretty sound proof which is so nice when vou have loud children during quiet times in the campground.

  7. It's still small enough that we can travel to and fit into most places! I love this so much. This was the main deciding factor for us to go smaller vs big rv camper.

  8. Did I mention it's so cute? It's not an eyesore parked in my backyard.

  9. The awning! It's not the sturdiest but it's so convenient especially in our pnw climate (I.e. could rain any time). And did you notice that we can use it as a proiector screen when it's down?!? We haven't tried this but l'll post about it when we do!

I'm sure I have a few more. We do have a list of improvements but they're small things so far, and we can figure out ways to resolve them.

We LOVE our HC1!

Sleeping well in your Happier Camper

I want to start this article by saying that I have made a lot of mistakes when it comes to sleeping well when camping. If you don’t get this right, it can really effect how you feel about camping in general so you really do want to figure this out, and early. Let me take you through what we got right, what we got wrong, and the products we chose along the way (please note that I am an Amazon Affiliate and if you click on a product image, I will get some really small amount of money if you buy anything on Amazon during a set period so that is a nice thing you can do).

I will start by saying that when we got the HC1, we always set it up at night to leverage 9 of the Adaptiv cube slots to configure a queen size bed. I still think it’s amazing that such a small rig can give you such a big sleeping space and then convert in the morning to a table and seating for breakfast. It’s one of the reasons I think Happier Campers are so unique and it’s still a favorite feature.

For those of you who haven’t seen one in person, the cube tops are cushioned and most people will use a combination of cubes, cube tops, tables and table top cushions to create the bed. To help you understand how that works, check out the picture on the left. First, notice how the some of the cushions have a seam down the middle and some don’t? If you don’t see a seam and it looks like just a square of material, that is a cube top. If you see a seam, like the three running through the middle, those are table top cushions. To create the queen bed, this person has used 6 cubes & 6 cube tops (3 at the top and 3 at the bottom), a single table top, a double table top and 3 sets of table top cushions (for the middle). If this sounds confusing, check out this video we did on setting up the bed. This set up will give you the flexibility of quickly moving from a bed at night to setting up tables in the morning with very little effort. And while the surface is fairly comfortable for sleeping, most people choose to get some kind of bed topper. Here is what our path to comfort looked like!


Our first attempt at a comfortable sleep started with using something we already had in the house. We had a down bed topper in a spare room and I thought this was going to be the perfect option for the camper. It was a queen size so I knew it was going to fit, plus if we were away camping there wouldn’t be anyone visiting and staying in the spare room. And while it worked, it wasn’t as comfortable as I needed. I think when a bed topper is on a mattress, you get a big benefit from what it’s sitting on and in this case, it was sitting on the cube covers so it was still too firm for what I needed. I want to caveat this point to say that for some people, this may be the perfect level of comfort, so don’t discount it - but read on because as I was soon to discover, it isn’t JUST about the comfort.


So to solve the problem of comfort, I bought another bed topper. This time I went for something more lux and because I’ve been trying to make decisions that cause the least amount of suffering for an animal (you don’t want to know how they get down for down products), I got this organic wool bed topper. Full disclosure, this was NOT inexpensive. But I also knew that if I didn’t figure out how to sleep comfortably in the camper, there was no point in actually having a camper to begin with. So I decided to spare no expense and if you are looking for a great product, I can fully vouch for how wonderful this is.

So now we were camping with two bed toppers - the down one and this wool one. Comfortable? Absolutely. Practical? Absolutely not. This is the point in my bed topper journey when I realized it wasn’t just about comfort, it was also about efficiency. And guess what? Traveling with two bed toppers is completely impractical. Have you ever tried to fold a bed topper to store it? Not happening - or not happening in a small camper for sure. We were either having to move the toppers into the car each morning so we could set up the interior of the camper with the tables or we would just leave the bed down and not bother. And THAT negated the whole value of the Adaptiv interior and having the flexibility to set up the camper however we would need it for that day. We needed a better option and as luck would have it, Happier Camper had apparently been thinking about this too.


At this point we were ready to upgrade from the HC1 to the HCT. We decided that our dog to human ratio and a desire to plan longer trips meant that a bigger rig made sense. And as we started to go through the purchase process, we learned that Happier Camper had developed a solution for a bed topper that I really just love. Their bed topper solves two problems - comfort and efficiency. From a comfort perspective, I was actually pretty shocked at how comfortable it is and that I didn’t feel like I needed any other support to get a good night’s sleep. But the efficiency is my favorite. part. The bed topper is actually two separate pieces. At night, you lay them together and connect with velcro to keep them from moving and separating. During the day, you roll up each piece individually and it acts as a bolster! I’ve got a video that shows this in more detail so check it out to get a feel for exactly how this works. And the story should in theory end here but there was something we hadn’t realized when we bought the HCT…

My original plan for sleeping in the HCT was that we would use the back of the camper for a bed, leave it down most of the time, and use the front part of the camper for sitting and eating. This would have worked just fine if it wasn’t for one small problem… The space in the back of the HCT doesn’t support a queen configuration, it supports a full size bed only. If it was only Mike and me, that would have been fine. But our 150 pound Newfoundland Charlie sleeps with us and there wasn’t any way that two humans, a Newf and a West Highland Terrier named Rose were going to sleep in a full size bed, so that meant we would need to leverage the front part for a bed at night as well. I will say that these are the moments where having the Adaptiv interior really shines. In any other rig, I think we would have been in trouble but because we can reconfigure our interior with ease, this wasn’t even a problem to solve. But we DID need to figure out what sort of topper Mike was going to sleep on since I would be in the back using the Happier Camper topper with Rose.

This is the first product we bought to try to solve for Mike’s sleeping situation. This is actually a VERY comfortable option. The mattress is 4” thick and it folds up and lays down very quickly. I think if we had young kids I would have a couple of these in the house for sleep overs, it was that comfortable. But the downside to this product is the same as we had with the original bed toppers, albeit less challenging. This folds up neatly into what is probably a 25” square that is about 12” deep. Is that impossibly large? Not at all. But is it this big block of a thing that has absolutely no other use during the day and just gets in the way? It sure is. I felt like we were almost back to square one with having this problem of solving for both efficiency and comfort so we tried another option.


Someone in our Facebook group had bought a Stoic camp pad and absolutely loved it, so we thought we would give it a try. And while it is pretty comfortable and it does roll up so you can put it away each morning, we still felt like we had this thing that didn’t have any other purpose except for sleeping on. I think that having had the Happier Camper bed topper and being able to use it as a sleeping surface during the day and a back bolster at night had really set an expectation for efficiency.

So you can guess what we landed on… yup, we bought another Happier Camper bed topper. And guys - these are not cheap. In fact, I almost didn’t buy the first one when we got the HCT because it just seemed like there should be a better option. But here is what I can tell you - I have spent more money swizzling on bed topper options than if I had just bought the HC version right away - not to mention the constant frustration with what to do with it during the day so we could get full use out of our rig. If you are handy with a sewing machine, creating your own topper/bolster combo is a real possibility. But for the rest of us, do yourself a favor and just get the Happier Camper version. I think you will realize pretty quickly how smart the design is and that it was worth the cost. Check out the video I posted on this topic here and drop in the comments below any options you think people should consider.

What kind of camper should I buy?

I see this post a lot on the Facebook groups that I’m in and it’s sort of like asking what your favorite color should be. No one can tell you. Any response is going to be based on that person’s preferences and you almost always see a recommendation to buy the rig they have. I get that. We love our Happier Camper and think it’s awesome, but it isn’t necessarily the right rig for everyone. So to help you figure out some of the basics, here’s an overview that I hope will help. Let’s start with….

Towing vs. Driving

It starts here. This is the most fundamental distinction between the different types of RVs and you need to consider both personal preference as well as what sort of an experience you are trying to have - not to mention how much money you want to spend (although you can spend a lot of money on both categories). We are currently in the You Tow camp with our original Happier Camper HC1 (2016) and our now Happier Camper HCT (2020). And while I could talk all day about how much we love this brand, I would not tell you to go buy one unless you’ve done some soul searching first. Start a list - here are some questions to get your started.


I think one of the big questions to focus on to start is, will you want to do any stealth camping in an urban environment? I know that might sound like an odd way to think this through, but if the answer to that is yes, then you probably do NOT want a travel trailer full stop and you can eliminate the category altogether. If we were parked with our HCT on the streets of Boston overnight (if we could find parking that is), it would be pretty obvious that we were sleeping in our rig. Whether or not that’s allowed is where the stealth part comes in. Some cities, like Boston, have city ordinances that prohibit people from parking a camper on the street. You would probably want to be in a Class B or B+ as they look most like a street vehicle so if this is a consideration and part of what you want to do in your camper, strike the travel trailers off your list and start a deep dive on Class A, B, B+ and C. I wrote this article to help people understand the difference between these so check it out if you need more info.


How much space do you need?

Another big question you need to sort is, what’s your tolerance for living in a small space? Do you want an apartment on wheels? Have you lived in a house for 20 years but have been dreaming of hitting the road? Downsizing to a small travel trailer or van may not be your best move. If you do want a large living area, you’ve still got drive vs. tow options - a Class A is huge but so are some of the 5th wheels. Either one could serve your needs. But with size comes some limitations. On average, most state and national parks will allow an RV with a maximum length of 30 feet. There are always private campgrounds near those parks, but they will generally be more expensive.


How it is made and resale value

Class B+

Let me start with the You Drive rigs. One big difference between a Class C and a Class B rig is how they are built and as a result the price is dramatically different. On a Class C, the manufacturer builds the living space first and they basically bolt it onto a chassis. With a Class B, it’s much more labor intensive and they are really creating an integrated home out of the vehicle itself. A Class B is generally going to be much higher quality and so the resale value is going to be better. I did some very simple online research and from what I can find, Class C and Class A have the highest depreciation of the You Drive rigs which makes sense as Class B/B+ hold their value better.

For the You Tow rigs, there are really two different construction types: fiberglass and ‘sticks and tin’. Sticks and tin is a term that just refers to the manufacture of the rig - a wood frame with a metal sheath. Fiberglass rigs hold their value better than sticks and tin because they don’t have anything that will rot. There is differentiation on the fiberglass rig makers as well. The HC1 and HCT have a double fiberglass shell so they are great for all weather camping. The Scamp is a great fiberglass rig but they have a single shell and an interior that has, well, its walls have carpet on it. Owners call it ‘rat fur’ which I’m sure the makers of the rig wishes they did not, but honestly while it’s pretty unattractive, it does provide insulation.

Another thing to consider is the slide out. A slide out is an option on some rigs in both categories where the outer wall of the rig can slide out to make for more room. If space is really important to you, then you will want to consider a rig with a slide out.

But a word of caution… When I see slide outs, I see something that can stop working and in my experience, things stop working at pretty much the worst possible moment. I do not want to be at a campsite, getting ready to head out only to discover that the slides won’t go in. Maybe I’m just risk averse - and the space just isn’t that important to us - but I would not buy a rig with a slide out..

And now that you’ve started to think about construction and what some of the drivers of costs are, let’s talk about price. Because let’s face it, we all want the best quality stuff with the best resale value, but most of us have to think about the reality of the purchase price .


Price

It’s about to get real folks. The reality is that quality construction and resale value are going to cost more money. This is a difficult topic to parse as there’s such a wide variety of rigs that you could consider but here is what my research has yielded on the cost of new rigs in both categories.

You Drive

If you want to buy a new You Drive, the average price of a Class C is going to run you between 50-100k .Yeah, it’s a lot of money. But it might be exactly the right buy for you so don’t discount it. Class A comes in at the next lowest price point (if you can even use that term in this context) at 50-200k. And finally, the class B/B+ can run you between 150-500k.

You Tow

Let’s start at the low end with the Pop Up which new, looks like it comes in at 10-20k. A tear drop averages 20-40k. The options on travel trailers is incredibly broad so if you are interested in these or a 5th wheel, plan on 50k and up.

Whether it’s drive or tow, these prices can be pretty intimidating but consider buying used. I always list used Happier Campers on this site when I know about them and while they don’t come up often, there are usually a couple available. And remember that you get what you pay for. In particular, be careful of anything that could rot or leak, mold, moving parts like slide outs that stop working - all reasons why we love our fiberglass Happier Camper as these do not apply!


Don’t be afraid to tow

I know you are going to be afraid to tow but I have to say it anyway, because unless you’ve got experience pulling a trailer of any kind, you will probably feel intimidated by the idea of towing and it might sway your decision making. Just know that everyone starts out never having done it and they learn. You got this.

Rent before you buy

Final word of advice - try to rent a rig that you are interested in before you buy. It doesn’t have to be the exact rig you want, but if you think you want a Class C, go rent one. Want to get a pop up? See if you can find one to rent. You may immediately fall in love or you might also realize that it just isn’t meeting your needs, even if you are figuring out what those are as you go.


Why you should buy a Happier Camper

Of course I’m ending this article explaining why you should buy a Happier Camper! I’ve got a long list of things I love, but here are my top 5 for your consideration.

  • Fiberglass construction, double hull - nothing to rot, all season, holds its value incredibly well

  • Adaptiv interior - I don’t know of any other rig that allows you to constantly reconfigure the interior and if you get the HC1, you can even use it as a toy hauler

  • Design - the HC1 has to be the cutest camper on the market with our HCT close behind

  • Back hatch on the HC1 - it’s absolutely the coolest and I wish they had this option on the HCT

  • Light weight - both Happier Camper rigs are considered ultra-lights which means it would be very unlikely that you’d also have to buy a new tow vehicle

I’m sure there are other differentiators to consider when buying your dream RV - post your questions below and I will do my best to find you an answer!

Useful things that made a difference

Our epic 2021 camping trip from Providence RI to New Mexico and Texas is complete and while it’s still fresh in my mind, I thought I would share the things we brought - or bought on the way - that made a difference.

Zip ties - put these in your cart for your next checkout because they saved us on Day One. Mike had an ‘oh, wait’ moment about 30 minutes into the trip and that was - he wasn’t sure how securely fastened the license plate he just put on was. The answer was, not at all. It was hanging by a single screw and we were very lucky not to have lost it. Thankfully we had zip ties in a cube because that’s how we kept the plate on for most of the trip. I wouldn’t recommend that being your long term solution - we double-upped on them when we got on to rough roads and by the time we were beach camping we realized there was only a single zip tie at each side, but these are an all purpose ‘get me out of a jam’ item to keep in your camper.

Hiking boots - I don’t think I’ve ever been more grateful for footwear. The weather was really variable on this trip and my Merrell’s handled the snow in New Mexico and the desert in Big Bend. And my plantar fasciitis didn’t bother me a single day I wore them. Plus, these are beautiful boots, even dirty.

IMG_2529.jpeg

Window cleaner - I don’t know if it was because we were traveling with the dogs or the crazy weather but at one point, it just felt like every window was grimy and sort of hard to see through. And that was in the car AND in the camper. Mike grabbed some of this at a local store and on a windy day (when being outside to enjoy the sun wasn’t such a great idea) I got them all cleaned and it felt (almost) like the start of the trip when everything feels very organized. This also has that ‘new car smell’ which made everything seem even nicer than it was!

Cast iron pan cleaner - this chain mail cleaned the cast iron like a champ and made clean up so much easier than in previous years. If you cook with cast iron, get one. And I’ve been eyeing this brush - if anyone has something like this, let me know how it works. I think it might be great but I don’t want it to take the seasoning off the pan.

Reusable paper towels - I’ve only started using these at home in the last year and I’ve been pleasantly surprised how useful they are - and I’m becoming even more aware of how much paper I’m not wasting by using them. I wasn’t quite sure how I would use them on the trip but decided to put them in the camper and I’m glad I did. The two major uses were 1) wiping down the condensation on the inside of the windows each morning and 2) I literally wiped down the exterior of the camper to clean it the few times we had a water hook up at a campground. They were great and I’m sure there are more uses I will find for them in the future.

Seltzers - Sort of a strange one for the list I know, but we brought a supply of seltzers and put them in the fridge drawer (which is awesome and you should get it) and were really glad we did. Having these at hand meant we weren’t buying something with a ton of sugar or caffeine from a gas station and just generally made us feel healthier on the drive.

20 foot dog leads - Whether you are in a campground or boondocking, you need to keep your dog safe. We want the girls to be able to have some freedom of movement, but we also want to make sure they don’t take off and either bother someone or get lost in the desert. We have two of these and while we have used the stake in the past, on this trip we just secured one end of the lead to the camper tongue as we were concerned our Newfoundland was going to be able to rip it out of the sand too easily.

Solar lantern - This one is both practical and beautiful! Our daughter gave us this as a gift for Christmas this year and we were grateful to have it. We made the mistake of leaving the inverter on and drained the camper battery while boondocking. Happier Camper has been including a small solar lantern with new purchases and it was helpful, but this one gave off a lot more light and REALLY saved us!

I am sure this list will grow as we think back in the coming weeks. How about you? What are some of the things you’ve brought camping and realized it was a lot more helpful than you thought it would be?

Which wheel lock should you buy?

If you have a travel trailer, you should have a wheel lock. You may not choose to use it all the time, but there is going to be a time when you wish you had one and you need to plan in advance. In this article I will explain the basics about wheel locks and what we bought to make our camper look less attractive to steal than the one down the block. 

Types of wheel locks

Let’s start with the basics because as with all things camping, there are a bunch of terms and four different types of wheel lock types that you will see when researching what to buy.

  • Clamps - Do a google search for camper wheel locks and this is the most common result. These pincer-type locks can expand to fit different tire sizes and to use it you just put one arm around either side of your wheel and lock it. They are often bright yellow or orange making it easy to see that you’ve made an effort to secure your rig.

  • Brace - These wheel locks are designed to work with dual tires and are shaped like an X. The brace sits between the two tires and prevents the tires from rolling.

  • Boot - You’ve probably seen something like this if you’ve ever seen a car with a boot on it due to a parking violation. The design includes a plate that covers the entire center of the wheel and it also has pincer arms like the clamp wheel lock.

  • Wheel chock - This one is also like a clamp lock but it has a plate that braces on the ground with sharp teeth. It’s name says it all. The design combines your need for a chock with a wheel lock.

What type of wheel lock do you need? 

That depends on your rig. Using the process of elimination, unless you have dual tires, you wouldn’t buy a brace so let’s set that one aside. Clamp locks and wheel chock locks are basically the same thing from a security perspective, so for the sake of ease of discussion, let’s just call these both clamp locks - which means the question is…

Should you get a clamp lock or a boot lock?

Keep in mind that we have a Happier Camper HCT, so our choice is based on our rig but I will give you a simple answer - if you can afford it, get the boot lock. From a pure security perspective, a boot lock is harder to remove than a clamp lock - so it’s the obvious answer. Get a boot lock. YouTube has dozens of videos showing how easy it is to remove a clamp lock with a crowbar, but that doesn’t mean that if you choose a clamp lock it doesn’t add value. Let me explain. 

Camper security is about looking less attractive than the next guy

And I don’t mean having a less attractive rig, I mean that when someone with ill intent looks at your rig next to someone else’s, yours looks like it is going to be more difficult and will take longer to steal. It’s as simple as that. YouTube is littered with videos showing how, with the right tools, almost every physical security measure you implement can be removed. I recommend that you don’t watch them, they will just make you anxious. What you need to figure out is, what is the right amount of money to spend to make my rig look less attractive to steal than the person next to me and what makes me feel less nervous that my very expensive investment is going to be where I left it. 

the right answer for us

We have a boot lock (and a hitch lock). We had a clamp lock when we first started out but it doesn’t take a sophisticated criminal with the right tools to remove it so, for us, it felt like having no lock at all. It was a big financial step up to get a boot lock but given how we want to camp (boondocking and leaving our rig to take off and explore), we felt the upgrade was warranted. We recently bought the Brahma boot lock and it’s outstanding. I did a video on this and you will note that I didn’t film the actual install of the lock. Well, I did film it but it involved Mike swearing a bit and multiple attempts to get it put on so I didn’t use it. I’m sure with practice it’s going to get easier but this is an important point for you to consider because the truth is, for most of the camping we did in our previous rig we had the clamp lock but we never used it. Wheel locks are sort of a hassle to put on and we are a bit lazy so you need to think about your personality, your risk profile and your budget when making your choice. 

Hopefully this helps you figure out the best wheel lock option for your situation. If you have any questions, feel free to leave a comment below. 


No, we don't need a drone but I'm getting one anyway

This is without a doubt the most self indulgent thing that we have bought since we got the camper and that’s saying a lot. If you haven’t read it yet, go check out this article - Ready, Set, Go! - to see what we travel with. It’s not a short list but as I say in that piece, we are really glampers more than we are campers and I’m not going to feel guilty about traveling with deck chairs, a french press and a metric ton of bed linen. It makes me happy, which by default makes my husband Mike happy. You know the saying - happy wife, happy life.

So why a drone?

Because… I don’t know. I’m not sure I have a good answer for this question. I suppose the easiest and tbh the most honest answer is that I think they are cool. I think being able to capture video from the sky, to learn how to navigate this little aircraft - it’s just a cool thing to be able to do. Does the fact that we’ve been trapped in our house for a year due to Covid play into this? Maybe. We are a little bored. Is it a mid-life crisis? I don’t think so… I will be 55 this year (please let that be mid-life) but I don’t really identify with age per se…. I think it is going to be fun so I’m going for it but there is one small problem.

I know nothing about drones

And when I say nothing, I mean the light leaving from the planetary system where I know something about drones is never going to reach the earth. So I did some research because I like to increase the likelihood that I will invest the right amount of money to get the right outcome. Below I’ve summarized some of the important things to consider when buying a drone and what it means from a cost perspective.

A36979CB-47A8-4FD9-971C-21D961A5396E_1_105_c.jpeg

Having figured out the fundamentals the question is - what’s the right combination of these functions for us to have the best outcome? We are obviously novices, so nothing too difficult to fly is important plus we really want to get what’s called an RTF - ready to fly model. There are other types of drones - BNF (bind and fly), PNP (plug and play) and ARF (almost ready to fly) - and these all have a level of complexity that I think is better suited to someone with experience. These models don’t come with either a transmitter or a receiver (or both) or they are best for racing. Which leads us to…

We are getting this drone

With a goal of being able to take cool aerial video around our neighborhood and while on camping trips, this is what we decided to buy - the DJI Mavic Air 2 Fly Combo. Here is why:

  • Battery lasts 34 minutes and it comes with them included

  • It’s got really good picture and video quality - one reviewer said that the best way to describe it as a seriously good camera that flies

  • It has responsive tracking to help us get better videos

  • It got an average of 4 1/2 stars on Amazon reviews

  • It has automatic obstacle avoidance which sounds really important since we don’t know what we are doing

There are cheaper drones that I looked at - less time in the air, not quite as good specs on the camera, made from plastic - which could be perfectly good options. There were much more expensive models which are for racing which, while cool, really exceed our needs. And while this model/package is not cheap (coming it at about $950), I do think it’s going to give us the best results. And Amazon has a great returns policy so if it isn’t right, we can start over again.

How about you? Do you have a drone? What model did you get? What features mattered most to you? And what were your biggest learnings as a novice - we could really use the advice!

Fridge Storage in our HCT

One of the reasons that Mike and I wanted to upgrade from the HC1 to the HCT was we felt that the bigger model would make for more comfortable long haul trips with the dogs - and for more boondocking. If you want to boondock for long periods, the consensus is you have to get (at least) three things right: your power, your water and storing your food.  It makes sense - if you want to be away from civilization for multiple weeks at a time, you won’t last long if you don’t have these fundamentals sorted. In this article I thought I would share with you what decisions we made when thinking about our food storage options, knowing we want to be able to boondock for long periods, and what we included in our HCT order. I will also explain the different types of fridges because apparently, that’s a thing. 


Fridge Types

Let’s start with fridge basics - there are two types of camper fridges: compressor and absorption. A compressor fridge is sometimes also called a 2-way fridge and they run on 12/24 volts and are powered by a vehicle or camper battery. 

The absorption fridge is also called a 3-way fridge and is the same as the compressor but it also runs on LPG gas. For reference, I’ve included how they compare here but what you should know is that HC is currently offering compressor fridge solutions. 

I couldn’t find anything that differentiated the efficiency so let’s assume it’s the same

I couldn’t find anything that differentiated the efficiency so let’s assume it’s the same

Our Choices for the HCT

When we were finalizing our order in August 2020 HC offered two fridge options in the compressor category plus the cooler cube - and we (of course) decided to get all three. Here is my take on each to help you figure out what you might want to buy, either with your order or after-market.

The first is the Dometic CoolMatic CD 30 - the fridge drawer option. The only difference that we see in the product link provided by HC and the one installed is the handle, but we believe the specs are the same. I love this product for a couple of reasons. The first is that it’s integrated beautifully into the kitchenette. It looks like it belongs there. The second is that it is much more spacious than I thought it was going to be. If we were going on a short trip, I think that this plus the cooler cube (or your own cooler) would work great. I do think that this is a product that you can purchase through Amazon and implement yourself as an aftermarket option - if you are handy. We have a couple of Facebook group owners who have modified cubes to meet their needs and if you wanted to create a cube with this installed, I think that is very doable. But if you are like me and Mike, just buy it direct from Happier Camper!

The second fridge option is a mini fridge. The link provided by Happier Camper was to this Dometic CoolMatic CRX 50. It is a drawer fridge, but the one that was included in our order appears to be this Dometic CoolMatic CRX-65 which is more like that mini fridge you had in college. Before you buy this one, you need to really think through how you intend to camp. If I was only doing an occasional multi-week trip and weekends, I think that the drawer fridge and cooler cube would do it. You will ‘lose’ a full square of the floor to have this and depending on whether you have the HC1 or the HCT, you might want to prioritize storage over the fridge. It’s going to be interesting to see how much use we get out of this but as of right now, I’m glad we included it in our order. Both of these would be good options if you want to buy after-market and again, it would not be difficult to mount one of these to a floor panel and make that feel integrated into your camper. I will say that the Happier Camper provided version includes a bamboo back with handles which I assume is to make it easier to move.

And finally, the Happier Camper cooler cube. I really like this product. I think there are good arguments for and against so let me list them here.

  • For - The cooler cube is part of the Adaptiv system and it integrates into the camper layout perfectly. It’s roomy and stores more than you might think plus it really holds the cold well. Yes, you could bring your own cooler but it will be one more thing to pack in the back of your tow vehicle or to have in the camper, taking up valuable space.

  • Against - You can buy your own cooler and pay less money for it.

The irony in all this is that our decisions were based on a desire to do more long-haul trips in the camper, and that this is something that may have to wait until we retire which won’t be for about 8 years. I’m sure there will be newer and more efficient options by that time but as usual, we decided to get it all just in case. We have been kicking around the idea of trying a multi-month road trip, working remote but with Covid, it doesn’t feel like the right time to be doing that so it’s going to be interesting to see what we do in the next couple of years and how our decisions work out. Are you planning long-haul trips in your Happier Camper? What do you think will be important to figure out to make that work? Comment below!


Towing the HCT or We Needed a New Thing

Sigh. Remember the towing article I wrote? It is pretty helpful I think and in it, I sort of lament at how we didn’t think through how changing our tow vehicle could necessitate a change in what we had for our whole towing set up. Well guess what? It happened again. I swear we are almost willfully ignorant when it comes to asking the question ‘How could changing ‘X’ have a knock on effect to ‘Y’?’ but here we are again… To be fair, it wasn’t a catastrophic mistake or anything and we were able to tow the HCT with what I will now call our ‘legacy’ set up for our first run, but man, you would think we would be better at this by now.

Picking up the HCT

Charlie definitely thinks ours is the prettiest

If you watched the video we posted, we expected the HCT to be delivered and not for us to pick it up. There wasn’t an issue or anything, it’s just that campers that are being shipped cross-country have a stop over in Ohio where they will be loaded on to the next truck heading to the east coast. As she was sitting in Lima, Ohio waiting for her ride east, Covid-related data was spiking and there was a lot of talk of implementing new restrictions. We had this vision of the HCT sitting in limbo on the lot in Ohio so we decided to just go get her ourselves while that was still an option for us.

It was a pretty uneventful drive out to Ohio from our home in Providence, RI and as always Rose and Charlie joined us for the trip. When we arrived, the camper was in a safe location and the owner Josh was really helpful in getting us on the road - but when we hooked up the HCT to our legacy set up, well, we had sag. It wasn’t so much that we wouldn’t be able to pull her home, but as Josh said ‘be careful going over railroad tracks’. I think the extra weight of the HCT, the extension that we need to use on the Macan plus the connector to raise the hitch just created too much play in the set up. And because we were there and I had an expert on hand, I asked Josh for a reco on what we should buy for the ideal set up. It was really great that he was there to help me with this because my first search result was not an aluminum hitch and would have been really heavy - so if you are wondering what to get, here it is.

I’d like to think that this is going to be our last towing related change, at least for a while. We have no plans for a new tow vehicle and we definitely won’t be changing our camper, hopefully for a very long time to come! Stay tuned for a video where we will tell you about our first impressions of the HCT and some of our ‘aha’ moments for things we didn’t expect.